The Leveling Macro
-
The leveling tools– Hands-on film about the dynamic functions: inter alia the new Fade Tool and the Leveling Macro. Shown here: Melodyne 5 studio, smaller editions may differ.

The Leveling Macro serves to reduce or eliminate excessive volume differentials between the notes on a track. It can be used to make quiet notes louder, or loud notes quieter, or both – until, in the extreme case, no dynamic variation remains.
Opening and setting the Leveling Macro
First select the notes you wish to edit. If no notes are selected, the macro will govern all the notes on the track.
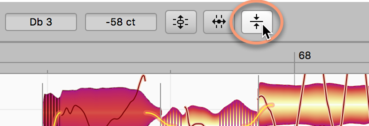
Now open the Leveling Macro either from the Edit menu or by clicking on the icon shown here above the Note Editor.
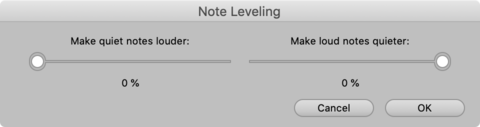
The macro offers you two converging sliders. The left-hand slider, as you move it from left to right, makes the quiet notes louder; the right-hand slider, as you move it from right to left, makes the loud notes quieter.
When you first open the macro, their positions are as follows;
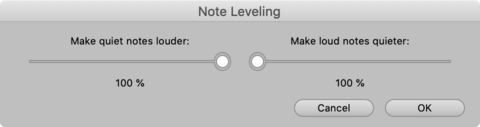
If you apply maximum leveling, they will then look like this:
The Mean Amplitude
Coming from the left (quiet) and right (loud), the two sliders as they converge shepherd the blobs towards the Mean Amplitude in the center. This value is derived from an analysis of the notes you selected before opening the macro. It is therefore based upon the musical content and cannot be adjusted manually.
When you use the macro, you will notice that any given note will respond either to one slider or to the other. The reason is obvious: a given note’s amplitude in the original audio file cannot be less and greater than the Mean Amplitude. Note also that since the ultimate extent of each slider is the Mean Amplitude (a line that neither can cross), a note that was originally quieter than the Mean Amplitude can never pass above it; and a note that was originally louder than the Mean Amplitude can never pass below it.
A further observation: You may notice that certain blobs, representing very quiet sounds that are also of very short duration, do not respond to the macro at all. This is deliberate, as Melodyne initially assumes the blobs in question represent (extraneous) noise, which if boosted by the left-hand slider of the macro would become even more obtrusive. Naturally, you can edit such sounds freely by hand using the Amplitude Tool.
If you have adjusted the volume of any of the selected notes manually using the Amplitude Tool before opening the macro, it is the adjusted rather than the original values that will be considered when calculating the mean amplitude. It is from the most recently set amplitude of the manually adjusted notes that any movement towards the centre will begin as the leveling takes effect. If you do not wish a manually adjusted note to be affected by the leveling, simply exclude it from the selection before opening the macro.
Of course, if you only select one note prior to opening the macro, neither slider will have any effect, as in that case the mean amplitude of the selection and the amplitude of the selected note will be identical.
Closing the macro and correction values when it is subsequently re-opened
Exit the macro with “OK” to keep your work or with “Cancel” to return to the status quo ante. Obviously, you can apply further adjustments later to the volume of the notes in question with the Amplitude Tool whether you exit with “OK” or “Cancel”.
Furthermore, even if you exit with “OK”, you can still use the Undo function to nullify the effects of the macro. Another way of doing this is to right-click (with the Amplitude Tool selected) and choose “Reset Amplitudes” from the context menu.
If you select a note the amplitude of which has already been affected by the macro and then open the macro again, the percentage shown in the macro window may differ from that displayed on the previous occasion. This is likely to be the case if the other notes selected are different on each occasion, as the mean amplitudes of the two selections will almost certainly differ and, with them, the percentage values displayed.