The Project Browser
The Project Browser shows you all the audio files used by each project and helps you manage them and locate missing files.
Opening the Project Browser
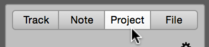
Both the stand-alone implementation and the plug-in possess a Project Browser. In each case, this is opened by clicking the “Project” tab in Melodyne’s info pane.
The Project Browser in the stand-alone implementation
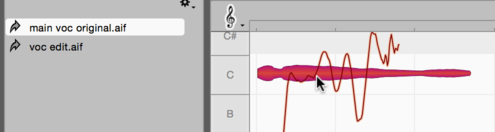
In the stand-alone implementation of Melodyne, the Project Browser displays all the audio files that you have integrated into the project – whether via the File menu, by dragging and dropping, or by recording. If you click a blob in the Note Editor, the Project Browser will highlight the audio file to which the note in question belongs.
You can drag and drop files from the Project Browser into the project in the same way as from the File Browser. You might do this, for example, when you wish to use the same file in several different places within the project.
Please note that the Auto Stretch Switch also governs the dragging of files from the Project Browser: if Auto Stretch is switched on, the tempo of the file will be adjusted to that of the project; if it is switched off, the inserted file will retain its original tempo.

Unused and missing audio files
In both the stand-alone implementation and the plug-in, audio files are color-coded in the browser as follows:
- Black: The file is present and being used by the project
- Gray: The file is present but not in use (e.g. because you have deleted from the project all the notes it contains)
- Red: The file is needed but unavailable
The reason unused files are retained in the Project Browser rather than being deleted automatically is that this allows you to undo the delete operation, which would otherwise be impossible.
If Melodyne cannot find one of the files it needs to use – either because it has been deleted or because it was not moved to a new computer along with the other project files – the missing file will be shown in red in the Project Browser. The notes belonging to such a file are shown in gray with a red outline in the Note Editor and are muted during playback.

Commands in the drop-down and context menus
The drop-down menu opened by the cog icon in the Project Browser as well as the context menu in the same browser offer the following commands, some of which are designed to facilitate the assignment of missing files.
Set Path for Transfers... (only in the plug-in): This allows you to specify where the transfer files should be stored, as is explained above.
Show in Finder/Explorer: If you choose this command after right-clicking on a file in the Project Browser, a Finder/Explorer window will open showing you the location of the file.
Copy File(s): This copies the selected file(s) onto the clipboard. This might be useful, for example, if you have passed on to another user a project missing one or more of the requisite transfer files; by selecting the missing file(s) in the Project Browser, choosing Copy File(s) and then pasting the contents of the clipboard onto a hard disk or other storage medium, you can remedy the error swiftly without having to hunt around for the missing file(s).
Copy Path for File(s): This copies as text to the clipboard the path of the selected files. This is useful if you need to send someone a list of missing files.
Find Missing Files: This opens a file selection window that allows you to locate the missing file on your hard disk and “show” it to Melodyne.
It is advisable to save your project after reassigning files, in order to store the updated references.
Copy External Files to Project Folder (only in the stand-alone implementation): This command results in all the files that you have imported into your project from different locations on your hard disk, whether via the File menu or by drag ‘n’ drop, being copied into the audio folder of your Melodyne project. This folder, which is created when your Melodyne project is first saved, is on the same level in the file hierarchy, and bears the same name, as the MPD file of the project, but with the suffix “_Audio”. It is advisable to save your DAW project after executing this command, in order to store the updated references.
Delete Unused Files in Project Folder: If you are certain that you will have no further need for files marked as unused in the Project Browser, this command allows you to delete them and liberate space on your hard disk.
The last two commands in the context menu allow you to specify whether the files in the Project Browser should be displayed in alphabetical order or according to status (missing, used, unused).