The Sound Editor – Introduction
-
The Sound Editor– How to enhance or fine-tune the timbre of each track or else create unique effects.

With Melodyne, you can edit not only the pitch, timing, phrasing and tempo of your recordings in a unique manner but also their sound. The bandwidth extends from subtle tonal adjustments and coloring to applications of a highly experimental nature. All these possibilities can be found in Melodyne’s Sound Editor, which you will get to know in this tour.
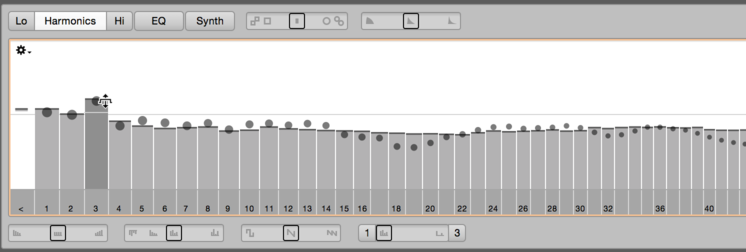
The Sound Editor works on the spectral level and offers you extensive access to the overtone structure of the notes. In combination with Melodyne’s other functions, you can obtain results with it that no other tool offers.
Working with the Sound Editor requires no special knowledge. This tour and a willingness to experiment are all you need. If you do wish to learn more about the theoretical basis, however, one good place to start might be this article in Wikipedia.
Opening the Sound Editor
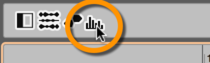
Melodyne’s Sound Editor has its own pane, which you can open by clicking the button shown here or by choosing Show Sound Editor from the Options menu.
The Sound Editor can be used for all tracks the contents of which have been detected using the Melodic or Polyphonic algorithms. If the Universal or Percussive algorithm was used for the detection of your audio material, you will be unable to open it in the Sound Editor without first choosing “Melodic” or “Polyphonic” (Sustain or Decay) from the Algorithms menu followed by “Redetect”.
You can apply the same Sound Editor settings to multiple tracks or use different settings for each. Under certain circumstances it is also possible to use different settings within the same track – e.g., to make the guitar sound different during the intro from the way it sounds during the verse.
What decides which tracks or track segments are affected by which settings is ultimately a combination of two things: the notes selected and the recording history. To make all this intuitive, we need briefly to explain something of the technical background.
The Sound Editor and the "audio source"
Suppose, to begin with, you record the bass and guitar simultaneously but on separate tracks; you might think of this as a single recording, since both parts were recorded at the same time, but, technically, you have created two audio files, not one. If you now do an overdub of the guitar – for instance, because you want to improve the first verse – you will end up, technically, with three files and, from Melodyne’s point of view, with three “audio sources”: the bass and the original guitar, both running the full length of the song, and the guitar overdub, covering the first verse only. (In the interests of simplicity, we are assuming you didn’t use multiple microphones to record the guitar, as then you would obviously have more than three files).
Sound Editor settings invariably affect at least one entire audio source – never some smaller musical fragment, such as a clip you may have created within it.
So in the example given above it would be possible to give the first verse (i.e. the overdubbed guitar repair) a different sound to the rest of the guitar track but not to apply different settings to the intro and the bridge, because these – you could almost say “coincidentally” – share the same audio source, because they were part of the same take and therefore recorded on the same audio file.
The note selection
If you select a single note only – from the guitar intro, for example – there can be no ambiguity as to which audio source you mean to edit; it can only be the first take; this, you will remember, comprises the entire guitar part except for the first verse, which you repaired on a subsequent take. This means that if you change the sound of the selected note in the Sound Editor, you will change the sound of all the other notes belonging to the same audio source – i.e. the entire guitar part except the first verse.
So although you may only have selected and edited one note, you are in fact instructing Melodyne to apply the same changes to all the notes belonging to the same take.
Individual value settings
Let’s suppose you are looking at a track in Melodyne derived from more than one audio source and have either selected all the notes or none whatsoever (it comes to the same thing). If you now lower the third overtone by 10 dB, the tone color of all the notes on the track will be affected.
If you then select just some of the notes and raise the same overtone by 4 dB, the net result will be a setting of -6 dB for the third overtone of the notes selected; others, however, may be unaffected by this most recent change, in which case their third overtones will remain at -10 dB. Whether the notes not selected are, or are not, affected by the change (once again) depends upon whether or not they are derived from the same audio source as any of the notes that are selected. To illustrate this, let’s return to the example of our guitar part, the first verse of which needed improvement:
If the notes selected belonged to the first verse only, when you set the value of the third overtone to -6 dB, all the notes of the first verse (whether selected or not) would be affected – but no others. In other words, you would have changed not only the notes selected but also one or two others to the right or left of it, as long as they were part of the same overdub.
If on the other hand, you had selected only notes belonging to the intro, then set the level of the third overtone to -6 dB, you would have changed the tone color of almost the entire track – i.e., the guitar part of every segment of the song that was recorded on the same take (the first) as the intro, which in our example means every segment except the (overdubbed) first verse.
So, if you want to apply different settings to different segments of the same track, you can do so quickly and easily. You can only edit a segment independently of the rest of the track if it has an audio source all to itself – not if it shares one with one or more other segments.
If you want to see which settings have been applied to a particular segment, just select one of its notes. In our example, the value for the third overtone will be either -10 dB or -6 dB. If, on the other hand, you select a larger range of notes, spanning several audio sources (in our example, say, the intro and the first verse), you will see a value somewhere between -10 dB and -6 dB for the overtone in question. This value is a display compromise: an average of all the audio sources concerned.

In the same way, any or all of the other Sound Editor controls will sooner or later end up showing approximate values, too, if you are constantly applying different settings to different segments by making targeted note selections. This is unavoidable, so when in doubt, place greater reliance upon what you are hearing than the values displayed.
Naturally, the techniques described here can also be applied to multiple tracks simultaneously. Select, for example, all the backing vocal tracks and boost a few overtones; assuming there were ten such tracks, the change would affect all ten. If you decided the results were too drastic, you could tone them down by selecting, say, five of the tracks and partially or completely undoing the changes, before perhaps tweaking entirely different parameters for those tracks. With no other tool can you improve the sound of your production as swiftly and with a comparable degree of flexibility.