Tempo detection and Auto Stretch
-
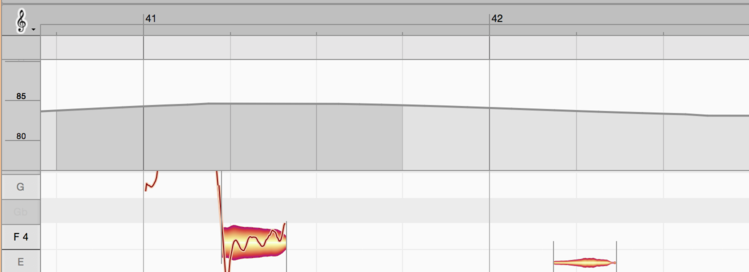
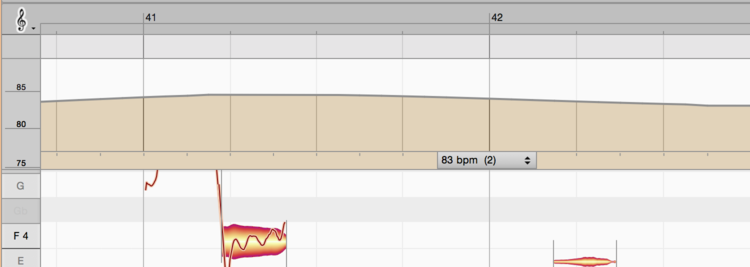
Working without a click– How to take advantage of Melodyne’s tempo detection and match the tempo of different recordings. Shown here: Melodyne 5 studio, smaller editions may differ.

Melodyne is capable of recognizing not only the notes but also the prevailing tempos and time signatures within a recording. This, combined with the tempo editing functions, offers you fascinating creative possibilities for your music.
Introduction
Melodyne’s tempo detection and tempo adjustment functions are used often and to great effect, yet they execute for the most part quietly in the background. Example: Drag a recording, a phrase or a loop into a document in the stand-alone implementation of Melodyne. Melodyne detects the tempo of the music and adjusts it to that of your project (even if this includes gradual tempo changes). The audio file runs in sync without your having to give it a moment’s thought.
No tempo detection is performed in two cases:
- When an assignment file containing the results of a previous detection and any editing thereof has already been saved for the new audio file – here the tempo has been detected already so there is no need to repeat the process;
- When Apple loops are imported, as these already contain information regarding their tempo – here, again, further analysis of the tempo would be pointless.
People often record to a click so that a timing reference will be available later. Often this metronomic click is felt to be constraining: Without the click, there is greater freedom and the music that results sounds more dynamic and vibrant; it is capable of ‘breathing’.
With Melodyne, you can dispense with the use of a click when recording and still retain a timing reference. The trick is simple: Instead of playing to the click resulting in a rigid timeline, with Melodyne you can simply adopt the tempo map of the actual recording – with all the minor fluctuations in tempo, sudden or gradual tempo changes, and changes in time signature it contains. The music, in other words, dictates to the timeline – not the other way around.
Whether in its detection of notes or in its detection of tempo, Melodyne never obliges you to be content with the dictates of algorithmic fate. You are invariably able to edit and improve upon the results of the tempo detection, overruling Melodyne’s decisions wherever necessary with decisions based upon your own knowledge of the music and thereby ensuring that the tempo map corresponds exactly to the music.
In this way, you create the ideal foundations for the actual tempo editing. This done, you could, for example, make the timing of a band recording tighter by quantizing the recording – not to a rigid grid but to one derived from the music itself, reflecting all the fluctuations and changes in tempo found in the original recording. The grid that emerges from the detection is still open to optimization, either by tightening it up or by redrawing the tempo map. In short: Melodyne offers you for the editing of musical tempo the same unique freedom and power as for working with notes.
Tempo in the stand-alone and plug-in implementations
Melodyne’s tempo detection only plays a role in the stand-alone implementation of the program; not in the plug-in. The reason is simple: The plug-in operates within a DAW from which it adopts not only the audio material but also all tempo information. Naturally with the Melodyne plug-in you can edit the timing in a multitude of ways, but it would be more than a little counterproductive to begin manipulating the tempo, as this would inevitably result in Melodyne and the DAW parting company. The same does not apply to the stand-alone implementation, from which you have full control of the tempo.
In consequence, the plug-in implementation of Melodyne has no functions for the editing of tempo. With two exceptions:
- The plug-in offers functions for “learning” tempo progressions, if any are created in the DAW after the transfer or are changed subsequently.
- In the ARA version of the Melodyne plug-in, there are functions for editing the tempo background that correspond to those in the stand-alone implementation, as – thanks to ARA – the DAW also profits from Melodyne and can, for example, adopt the tempo detected by, and edited using, Melodyne throughout the song.
In the following, we present the fundamental concepts for the handling of tempo in the stand-alone implementation of Melodyne. The two exceptions just referred to and the detailed operation of the Tempo Editor are subjects dealt with in separate tours.
Determining the tempo in the stand-alone implementation
In the stand-alone implementation of Melodyne, with a new document the tempo and time signature fields are initially empty; instead of a value in each case a simple dash (“–”) is displayed.

The Time Ruler, initially, is calibrated in seconds. So you begin with a blank sheet and can either enter the tempo and time signature for the Melodyne project manually or allow Melodyne’s tempo detection routines to do their work.
To enter the tempo manually, proceed as follows (the default values, unless others are entered by hand, are 120 BPM for the tempo, 4/4 for the time signature, and quarter note (crotchet) intervals for the Time Grid):
- Enter the desired value in beats per minute (BPM) in the tempo field
- Enter the desired values for the numerator and denominator of the time signature
- Enter a musical note value instead of seconds in the menu for the Time Grid
- Click on the button between the time signature and tempo fields in the transport bar to activate the metronome. * Opening the Tempo Editor If you are used to working with a DAW, you may prefer to set the tempo manually before beginning work on your project. Since Melodyne is extremely good at detecting the tempo, it is in many cases easier and more practical simply to allow Melodyne’s tempo detection routines to determine the tempo for you.
To allow Melodyne’s tempo detection routines to determine the tempo, proceed as follows:
- Instead of initializing the tempo, time signature and Time Grid values manually, as just described, begin recording with the tempo and time signature fields empty. Now you no longer need a click to listen to as you record because Melodyne will detect the tempo and tempo fluctuations within the recording and adjust the grid lines and subsequent click accordingly. Instead of entering a numerical value for the tempo, in other words, you are determining the tempo through your performance.
- Melodyne’s tempo detection routines work in an analogous fashion when, instead of recording, you import previously recorded audio. The same condition applies here: you must begin with a blank sheet i.e. you must leave the tempo and time signature fields and the Time Grid menu untouched. To determine the tempo by means of an audio file, you must load it either by choosing File > Import Audio from the main menu or by drag ‘n’ drop. Melodyne will then detect the tempo of the file, set the project tempo accordingly and position the file in such a way that its musical content begins at Bar 1. As a rule, the first note of the music appears in Bar 1, with any silence in the recording that precedes the first note falling in the negative zone of the Time Ruler. If the music begins with an anacrusis, however, (i.e. one or more unstressed notes that precede the first bar line), Melodyne places this in Bar -1, so that the stress falls on the downbeat at the start of Bar 1. If you like, however, you can realign the bar lines by dragging in the Time Signature Editor. This is useful, for example, if you want to renumber the bars or simply nudge the entire contents of the file one beat to the left or right, so that downbeats become upbeats and vice versa.
In Melodyne studio, you can import multiple audio files in one go to determine and set the tempo for the entire project. When you do this, Melodyne’s tempo detection is based on information derived from all the files concerned, which increases the reliability of the process. To take advantage of this facility, proceed exactly as described above, only select more than one file. When these are imported, they will be placed on separate tracks.
Please note that files imported simultaneously must belong together musically for the tempo detection to make any sense. If you’ve recorded a band playing live, for example, with different tracks dedicated to the various instruments, it would make sense to import them all in one go, as they share a common tempo. It would be nonsensical, on the other hand, to import simultaneously one track recorded at 120 BPM and another recorded at 93 BPM and expect Melodyne to detect a common tempo. Furthermore, we recommend that the first batch of tracks imported, upon which the joint tempo detection will be based, should only include instruments that maintain a fairly regular tempo. Solo instruments played very freely, for instance, that might confuse the tempo detection, are best excluded from the first batch and only imported later.
Auto Stretch when importing additional audio files
Once the tempo has been determined, by whichever means, your project will have a tempo map with a time signature, an appropriately spaced grid and a tempo curve tracing any fluctuations in tempo it contains. The presence of this tempo map introduces new possibilities when additional files are imported; possibilities that were not present when we were working with a blank sheet. The Auto Stretch Switch, for example, which was grayed out before, now offers you two choices:

- With Auto Stretch switched on, every new file imported into the project will be adjusted to ensure it conforms to the tempo map in place and replicates any tempo changes it contains. To make this possible, Melodyne first analyzes the tempo of the material to be imported and then squeezes or stretches it wherever necessary to match the tempo of the project.
- With Auto Stretch switched off, no attempt is made to adjust the tempo of the imported file to that of the project; so initially, it simply plays back at its original speed. You are perfectly free, of course, once the material has been imported, to stretch or squeeze notes to your heart’s content as you edit the material. All turning off the Auto Stretch switch does is prevent the tempo of the imported file adjusting automatically to the tempo map of the project.
Where on the Time Grid the file is initially positioned depends upon the procedure used to import it:
- If you choose File > Import Audio from the main menu or drag the file onto the track header , the physical start of the file (i.e. the first sample) will be aligned with the “0:00” seconds mark on the Time Ruler, which may be, but is not necessarily, the beginning of Bar 1. If the Auto Stretch Switch is on, the file will adjust to the project tempo; otherwise not.
- If you import the file by dragging it to a particular point on the Time Ruler (the “dropping point”) and Auto Stretch is switched on, the file will be aligned such that the first beat of the first complete bar coincides with the dropping point; if Auto Stretch Switch is off, the physical start of the file will be aligned with the dropping point. When this procedure is used, the file will snap to whichever line on the Time Grid is closest to the dropping point, so your Time Grid setting (quarter notes, eighth notes, sixteenth notes…) is of importance here – unless, of course, you wish the grid to be disregarded, in which case hold down the [Alt] key as you drag and drop the file onto the Time Ruler.
If, instead of a time value, the Time Ruler is calibrated in seconds, the Auto Stretch function is automatically disabled; the Auto Stretch Switch is grayed out and no attempt is made to adjust the tempo of the imported file to that of the project.
Unless Melodyne has correctly detected the tempo of an audio file, it will be unable to adapt it successfully to that of the project as it will be working with false assumptions as to the tempo of the newly imported file that it cannot correct without your intervention.
If you see that something has gone wrong with the tempo adjustment, proceed as follows:
- Delete from your project all the blobs belonging to the newly imported file.
- Create a new project document in Melodyne and load the file into it.
- Open the Tempo Editor in Assign Tempo Mode and correct the erroneous tempo interpretation.
- Copy the blobs and switch back to the original project.
- Switch Auto Stretch on, move the cursor to where you wish to insert the notes, and choose Edit > Paste.
Auto Stretch when notes are moved or copied
The Auto Stretch Switch plays a role not only when audio is imported but also when notes are moved or copied.
If at the destination (i.e. the point to which the notes are moved or pasted) the tempo differs from that of the source (i.e. the place from which they are taken), depending upon whether Auto Stretch is switched on or off they either adopt the tempo of the destination or retain that of the source. As a general rule, before copying or moving notes you will want to switch Auto Stretch on, so that they adjust to the tempo of the destination.
As a result, naturally, they will sound somewhat different to the way they sounded in their original location. If you wish to avoid this, in the Tempo Editor of the stand-alone implementation of Melodyne you can copy not only the notes but also corresponding segment of the tempo map from the source to the destination (which, naturally, will have the further consequence of influencing the notes already present at the destination). It makes no difference which you copy first: the notes themselves or the corresponding segment of the tempo map.
Whenever you alter the tempo curve, the notes affected always adjust to the altered tempo – regardless of whether Auto Stretch is activated or deactivated.
The difference between editing and assigning tempo
Not only is Melodyne capable of detecting the tempo of one piece of audio material and adapting it to the tempo of another, but it also offers you functions for the detailed editing and shaping of tempo progressions. To access them, begin by choosing Options > Open Note Editor from the main menu.
Here you are presented with a choice: Just as for notes there is a Note Assignment Mode (for the detection) and an edit mode (for the music itself), so also for the tempo there are two fundamentally different operating modes.
In Edit Tempo Mode, you can introduce changes in tempo (whether sudden or gradual) to which the notes will then conform. In this mode, in other words, you are shaping the tempo of your music.
In Assign Tempo Mode, on the other hand, you are correcting, where necessary, Melodyne’s interpretation of the tempo prevailing at any given instant. In this mode, it is not the music itself that you are editing but the tempo map, which you are reshaping to reflect more accurately the musical reality. In this mode, therefore, you are not making any audible changes but simply checking and correcting, wherever necessary, the Time Grid behind the blobs. The goal here is to ensure that the tempos discerned by Melodyne really do accord with those understood and implemented by the musician(s).
It is just as important to check and, if need be, edit Melodyne’s detection of the tempo before you begin work as that of the notes, because it forms the foundation of all subsequent tempo editing. It should be added that Melodyne is extremely good at detecting the tempo; it may even be that you will never, or seldom ever, need to make use of Assign Tempo Mode; this will largely depend upon the clarity of the sonic image of your loops or recordings and the playing techniques employed.
The operation of the Tempo Editor in these modes is described in separate tours.