Using the Editing Mix Fader
In Melodyne studio, you can examine and edit the contents of multiple tracks simultaneously. While you are editing, you will probably want different volume ratios between these tracks than those obtaining in the full (DAW) mix of the song.
If, for example, you are matching the second voice to the first, you will certainly want the second voice (the one you’re working on) to be a little louder than, or at least as loud as, the first. And when you switch focus subsequently to the third voice, you will want this and the second to swap levels.
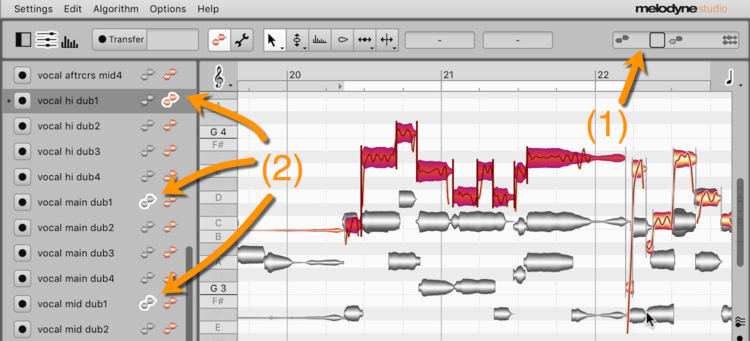
During local playback (i.e. when you start Melodyne with the DAW stopped; see previous tour), you can obtain the balance you want by adjusting the Editing Mix Fader (1), without affecting the mix in the DAW.

The effect at any given moment of the Editing Mix Fader is determined by the status of the “edit” and “reference” buttons in the Track Pane (2). With the fader at its leftmost extreme, all you hear are the tracks with the orange “edit” buttons activated, these being the tracks you are currently working on in the Note Editor. As you move the fader to the right, the tracks with the gray “reference” buttons activated (these being displayed for reference only in the editor) join the mix and become gradually louder until, in the center, the “edit” and “reference” tracks are equally loud. As you move the fader from the center further to the right, the Melodyne tracks not displayed in the Note Editor become louder in the same way.
In practice, once you’ve found a suitable position for the Editing Mix Fader, the “edit” and “reference” buttons alone will do all the heavy lifting, ensuring you obtain the desired balance automatically as you switch from track to track.
The exact workflow is shown in this film.
Multitrack Note Editing
For more details, see the user manual.
The Editing Mix Fader